

There is no need to explain why the idea of a natural swimming pool makes everyone so excited. Summer in Portugal, with temperatures often above 30°C, makes you want to spend all day in the water. Plus being able to replace all the chemical pool treatments with beautiful plants, sounds brilliant! A Natural swimming pool is a concept that imitates a natural lake. The idea is to create a comfortable swimming area for humans and a part of the pool where plants are cleaning the water. This works, because waterlilies and bulrush or whatever plants you choose, feed on the same nutrients like algae. The less free nutrients, the less algae which on their part would otherwise cause the most common problem with pools – blurry water.
Building a natural swimming pool step by step
Every successful project should start with a good plan. To understand the detailed look of our future project and to calculate the size for our pond liner, we made a 3D model with the help of a design software (SketchUp). This way we could estimate the depth in the different zones: deep for swimming and shallow for the plants. To make the ecosystem function well, at least 1/3 of your pool surface should be reserved for the plant zone. Of course the more of it you can spare, the cleaner the water. In our design the shallow zone is about half of the total surface. Also the shallow zone has two different depths to meet different needs of different plants to provide a high diversity.
Earthworks
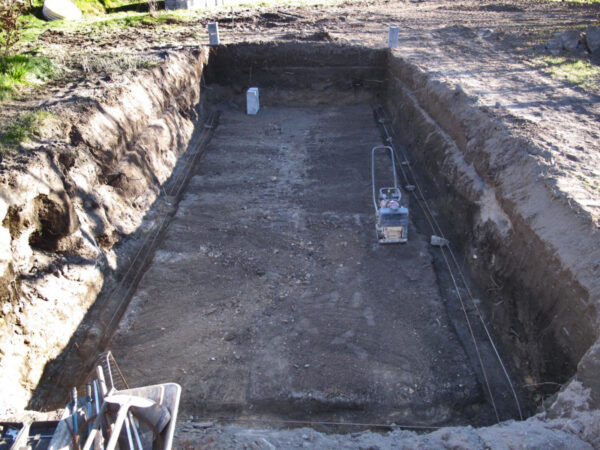
The practice began with the excavation of the ground. To do this massive job, we had the help of a digger. In our case we’ve been lucky to achieve multiple tasks at once, when we excavated the ground. All the soil that we took out we used on another spot, which is the future building site of our house. After we’d created the deep zone and shaped the shallow areas of the natural swimming pool, we had a big hole that looked like a pond already. If you don’t have particular need for such massive soil excess, one great idea is to use it later in earth-bag method for building up the pool walls. Next we compressed the ground in the swimming area (deep zone) with a normal construction rattle plate. Also we dug a trench about 40x40cm in the exact position where our wall would stand later. The wall would separate the deep zone from the shallow area. It will be fully underwater, so that the surface water can mix between both zones. On the other hand the soil and stones in the planting area cannot slide into our swimming zone over time.


Liners
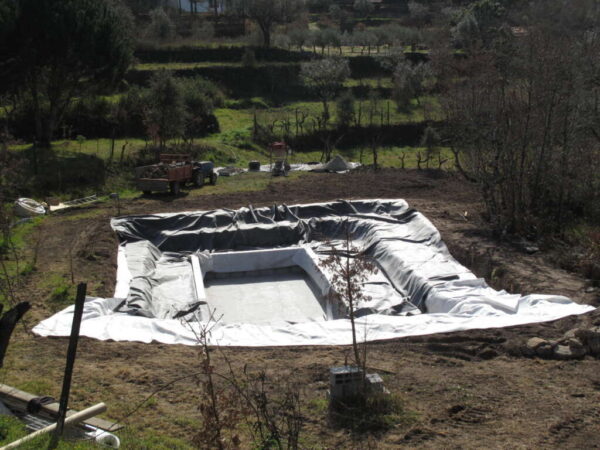
Since opening the ground, the time was running against us, as we were building during early spring and it could rain any time. You don’t want the water to come before you put your liner in, otherwise you end up with a huge puddle of mud. So we didn’t hesitate long and joined several stripes of geo-textile that we used as a under-liner. To join the stripes we just used a hot air gun and a roller. With a bit of practice it was quite easy to melt two stripes together. The result was one huge piece of PVC geo-textile that hat the same measure as our liner. We put it in the hole and this way we could also double check the size and position of the line. It was great to have the geo-textile in the same size, but with only a fraction of the weight. This way we could easily adjust the corners and outlines.
Next we needed help. The liner we chose is a EPDM 1.5mm pool liner that came in one piece of 12x15m and a stunning weight of over 400kg. Luckily we had our little tractor on site to drag the bundle into position. Also it was great that the company marked how they had rolled the liner. This way we knew exactly how to open it with the least effort. It still took 8 people and a bit of muscle power to get the package unrolled and unfolded. After we made sure all the liners (EPDM and the geo-textile) were in exact position, we could move on with building up the wall.
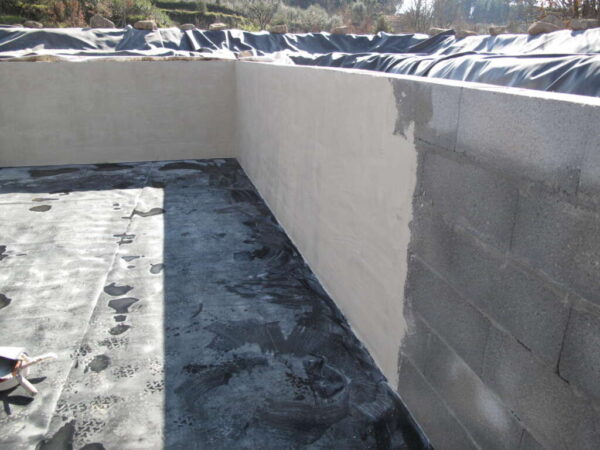
The wall of the deep zone
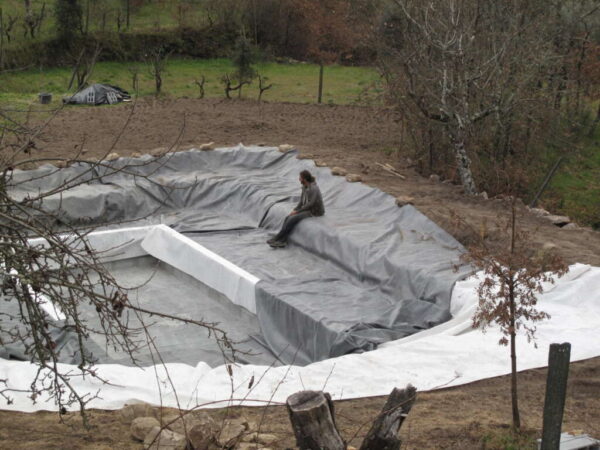
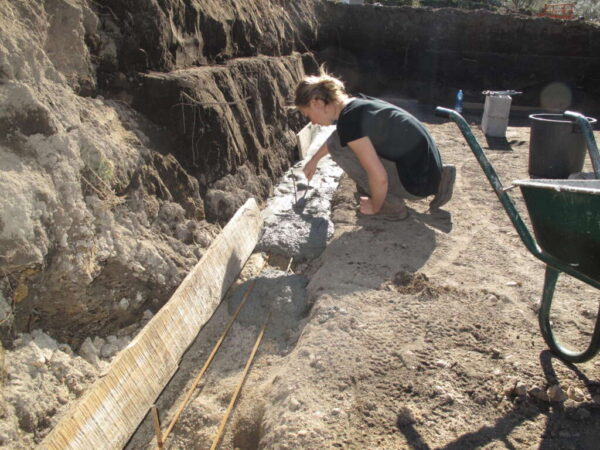
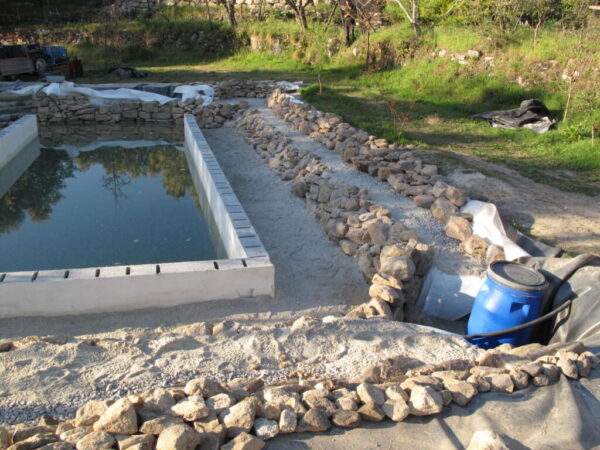
Now inside our lined pool, we started to build the separation wall in the exact position, where we had previously poured the foundation. To protect the liner we placed another layer of geo-textile under the blocks of the wall. Row by row, we built up the wall to a final height of 1,40m. To save concrete I had designed a wooden crate, which we could fill with mortar and slide along the wall. This made work much easier and faster. Also we could ensure to use the same amount of mortar in all places. When the wall was finished, we back-filled it a bit all around, where the whole was wider than our final swimming area. We wanted to minimize the use of concrete as much as possible. But considering the time pressure and weather conditions, we figured that concrete bricks would be the way for us this time. Alternatively you could make a separation wall from wood or from the already mentioned earth-bags.
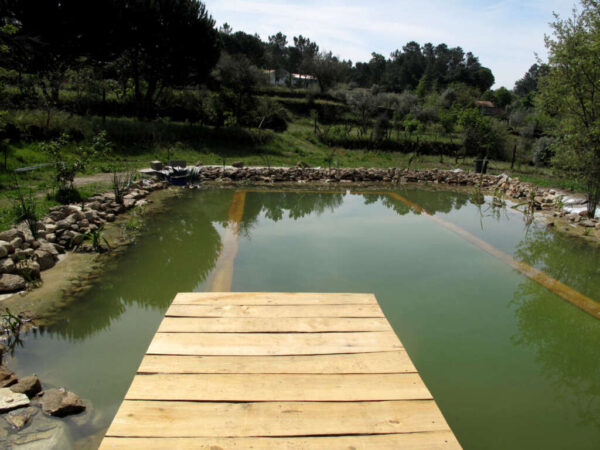
As a finishing we added wooden planks on top of the wall. These will serve as a nice underwater bench and make the look of our pool more beautiful. Also we built a wooden deck from which we could later hop into the deep water directly. We are blessed with 2ha pine forest on our land and our own sawmill. This is also why we didn’t treat the wood anyhow, considering how easy it is for us to replace to plank if it roots. Also, if the wood is completely under the water all the time and therefore doesn’t get much oxygen, it should last a very long time.
The shallow planting zones
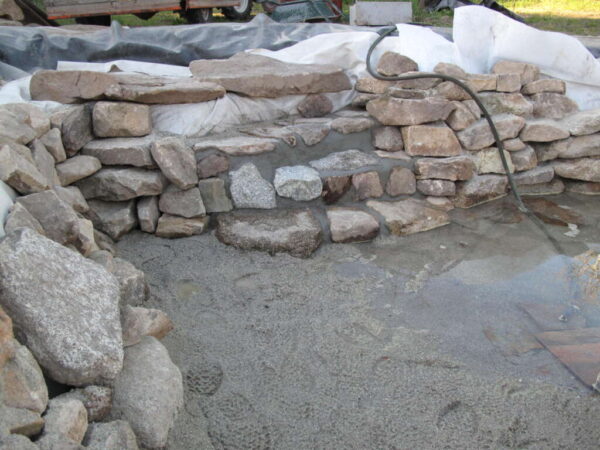
We built up little terrace walls from loosely staggered stones all over the shallow areas. These were left over from a demolished dwelling on the land and found a great new purpose in the pool. We also installed 50m of drainage pipe along the terrace of the shallow zone. These pipes would become part of our water treatment system, to support the plant’s before they establish properly. We buried them in a layer of gravel for a good drainage. Later we covered the gravel with sand for a nicer optic and an extra filtration step.


Planting the natural swimming pool
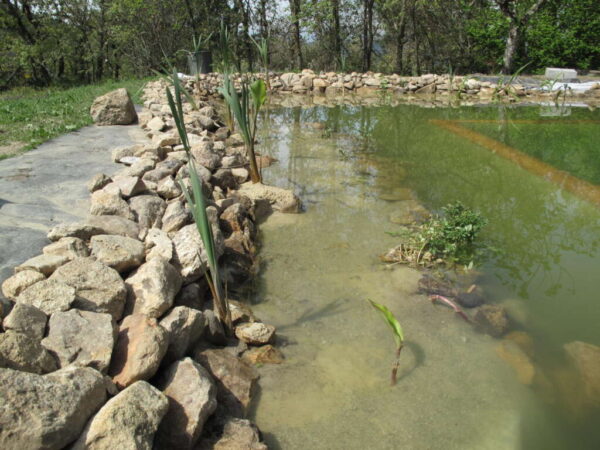
Now it was time to plant and fill up the water. We collected a wide spectrum of aquatic plants from different lakes, ponds and riversides in our area. This saved us a lot of money in comparison to buying the aquatic plants from a nursery. It also guarantees that the plants will survive in our climate conditions. We were surprised how fast we could notice the effect of the vegetation purifying the water. Within a few days after planting the pond cleared up from it’s initial blur. Also all the plants that we gathered from the area seem to love their new home and they grow rapidly. As a last step we arranged some river stones to be placed around the pool as a little weed barrier and for the lagoon optics.


The additional filtration features
We ordered a mechanical sand filter and a special pool pump which is save to operate, even while people are in the water. The pump circulates the water from the swimming area through the sand filter into the underground pipes and straight to the roots of the plants. Now, after the first couple of months of observing the pool’s ecosystem, we are actually surprised how little we have to run the filter pump. We only turn it on for a night every now and then, in average a few hours per week. That is when we either have a lot of people using the pool or when we want to cool down the pool after very hot days. The pump uses 400 Watts and is the biggest running cost, therefore it’s nice we don’t use it much.
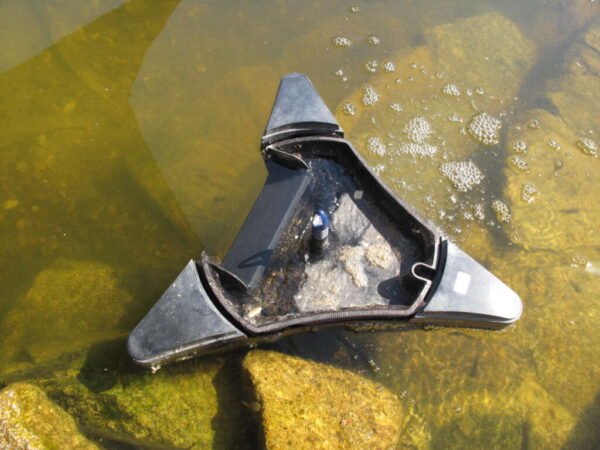
Additionally we bought a floating skimmer, that can catch the particles floating around on the surface. It runs almost daily to keep the input of organic matter to the pool limited. This way the water is not getting too rich in nutrition and we don’t need to worry about algae growth. The skimmer uses only 40 Watts and is therefor fairly inexpensive to run.

Was it worth it?
To sum it up, if you are a nature lover and appreciate a cold dip in the summer without the smell of chloride, then it’s really worth considering to install a natural swimming pool. Specially in Portugal the water situation is so important right now. And another amazing advantage of natural pools is that instead of making happy only people, they create a whole new habitat for aquatic wildlife. Already now we are happy to provide a habitat for flowers, countless frogs and tadpoles, dragon flies even birds that come for a bath and to hunt insects.
If you have more questions, feel free to drop us a message or have a look on our farm tour offers, as well as the permaculture courses and workshops.
.


It is so beautiful and gave me that tingling feeling all over, it looks amaziing.
I will definitely make myself one, once I’m on my new piece of land . . I think
I’ll start with a smaller version for me and my dogs, but that looks so great.
The construction of the pool is inspiring,
could you please tell me the cost of the entire construction ?
Thanks for your nice feedback! The rough total cost was not more than 5000euros, including the materials and the excavation done by the digger. The main cost however is the EPDM liner, so the price will vary very much depending on the size of the pool.
Hello, we are moving to Braga in October. Is there a company that can do this? Also, do we need to file a permit with the local government?
Hi! We only know a company that is based in our area, so I suppose you would need to search for it more locally. About the permit it also varies between different councils, so it’s best to talk to the local architect. In Coimbra area you don’t need an extra permit for the pool, as long as it is up to 50m2. That’s a law for the regular swimming pools, but the natural pool is even easier, because you can always claim that it’s just a pond. Good luck!
Hi guys! Such a useful blog, thank you for sharing 🙏🏼 we hope to build something similar. Could you share where you bought your liner from? We’re desperately looking for one! Thank you.
Thanks for this nice feedback. Here is the link to the shop we have our liner from: https://www.epdmprecio.com/ They are based in Spain, but delivering to Portugal. Good luck!
We have a small finca in Villablanca and would like to construct a natural swimming pool. Do you know a company that can do the construction
Hi Martina, a really nice project, i ve a place in the Algarve and am looking to build one of these. You tolerate frogs and tadpoles but how do you prevent ducks from staying in the pool or are they allowed, is there anything you wouldn t tolerate? Regards Bill